Why Your Mylar Bag Food Storage Is Failing: The Mistakes Ruining Your Emergency Food Supply
Introduction
You spent three hundred dollars on mylar bags, oxygen absorbers, and food-grade buckets. You watched the tutorials, followed the steps, squeezed out the air, sealed everything tight. Your garage looks like a prepper's wet dream: rows of silver bags filled with rice, beans, pasta, and oats. You sleep better now. You're ready for whatever comes. Except you're not. Because right now, while you're reading this, mold is colonizing your wheat. Oxygen is seeping back through microscopic channels in your seals. The pasta you thought would last twenty years will be rancid garbage in eighteen months. And you won't know until the day you actually need it—the day you crack open that bucket during a crisis and discover you've been storing expensive, inedible trash. This isn't rare. This is happening in thousands of basements right now. The YouTube tutorials got you 60% of the way there, which in food storage terms means total failure. The difference between "pretty good" and "actually works" is the difference between your family eating or your family starving while surrounded by ruined food. So let's talk about the mistakes that are destroying your emergency supply right now, and what you need to do in the next 48 hours to fix it.
The Oxygen Absorber Math That's Failing You
Here's the most common failure point: you're using the wrong amount of oxygen absorbers. Not a little wrong. Catastrophically wrong. The standard advice says "use a 300cc oxygen absorber for a 1-gallon mylar bag." Sounds simple. Except that advice assumes you're storing something dense like rice or wheat. The moment you switch to pasta, freeze-dried fruit, or anything with air gaps between pieces, that 300cc absorber is suddenly doing half the job it needs to do. Here's why: oxygen absorbers remove oxygen based on volume, not weight. A gallon bag of rice has maybe 20% air space. A gallon bag of macaroni? Closer to 50%. Same bag size, completely different oxygen load. For less dense foods with more air, like pasta or beans, a 5-gallon bucket needs 25 to 30 of the small 100cc absorbers or 5 to 6 of the 500cc absorbers. Most people are using one 2000cc absorber and calling it a day. And it gets worse. Most preppers don't account for headspace (the empty space at the top of the bag). Depending on how much headspace you have, you may not have used sufficient oxygen absorbers for the size of the bag. Too much headspace means too much air, which means your absorber gets overwhelmed. The bag might even contract slightly, making it look sealed while oxygen slowly destroys everything inside. Then there's the activation timeline nobody mentions. Once you tear open that vacuum-sealed package of oxygen absorbers, they start working immediately. You'll feel them get warm—that's the iron oxidation reaction happening in real time. You have maybe 15 minutes of useful working time before they start losing effectiveness. Yet people open a pack of 100 absorbers, use 20, and leave the rest sitting in a ziploc bag "for later." Those remaining 80 absorbers? Dead within hours. The fix: Fill a mason jar with rice, drop your unused absorbers inside, and seal it tight.
The rice packs densely, leaving minimal air, and the small container volume means your absorbers stay active for months. But you need to do this within 15 minutes of opening the original package, not three hours later after you've finished sealing bags. Here's the brutal reality from PackFresh USA testing: seam failure dropped from 8 percent to 1 percent when operators made a second quick pass after the bag cooled 10 seconds. That means 8 out of every 100 single-sealed bags are leaking oxygen back in. Slowly. Invisibly. Your food looks fine for the first year, maybe two. Then you open it and discover a layer of mold or the unmistakable smell of rancidity. By then it's far too late.
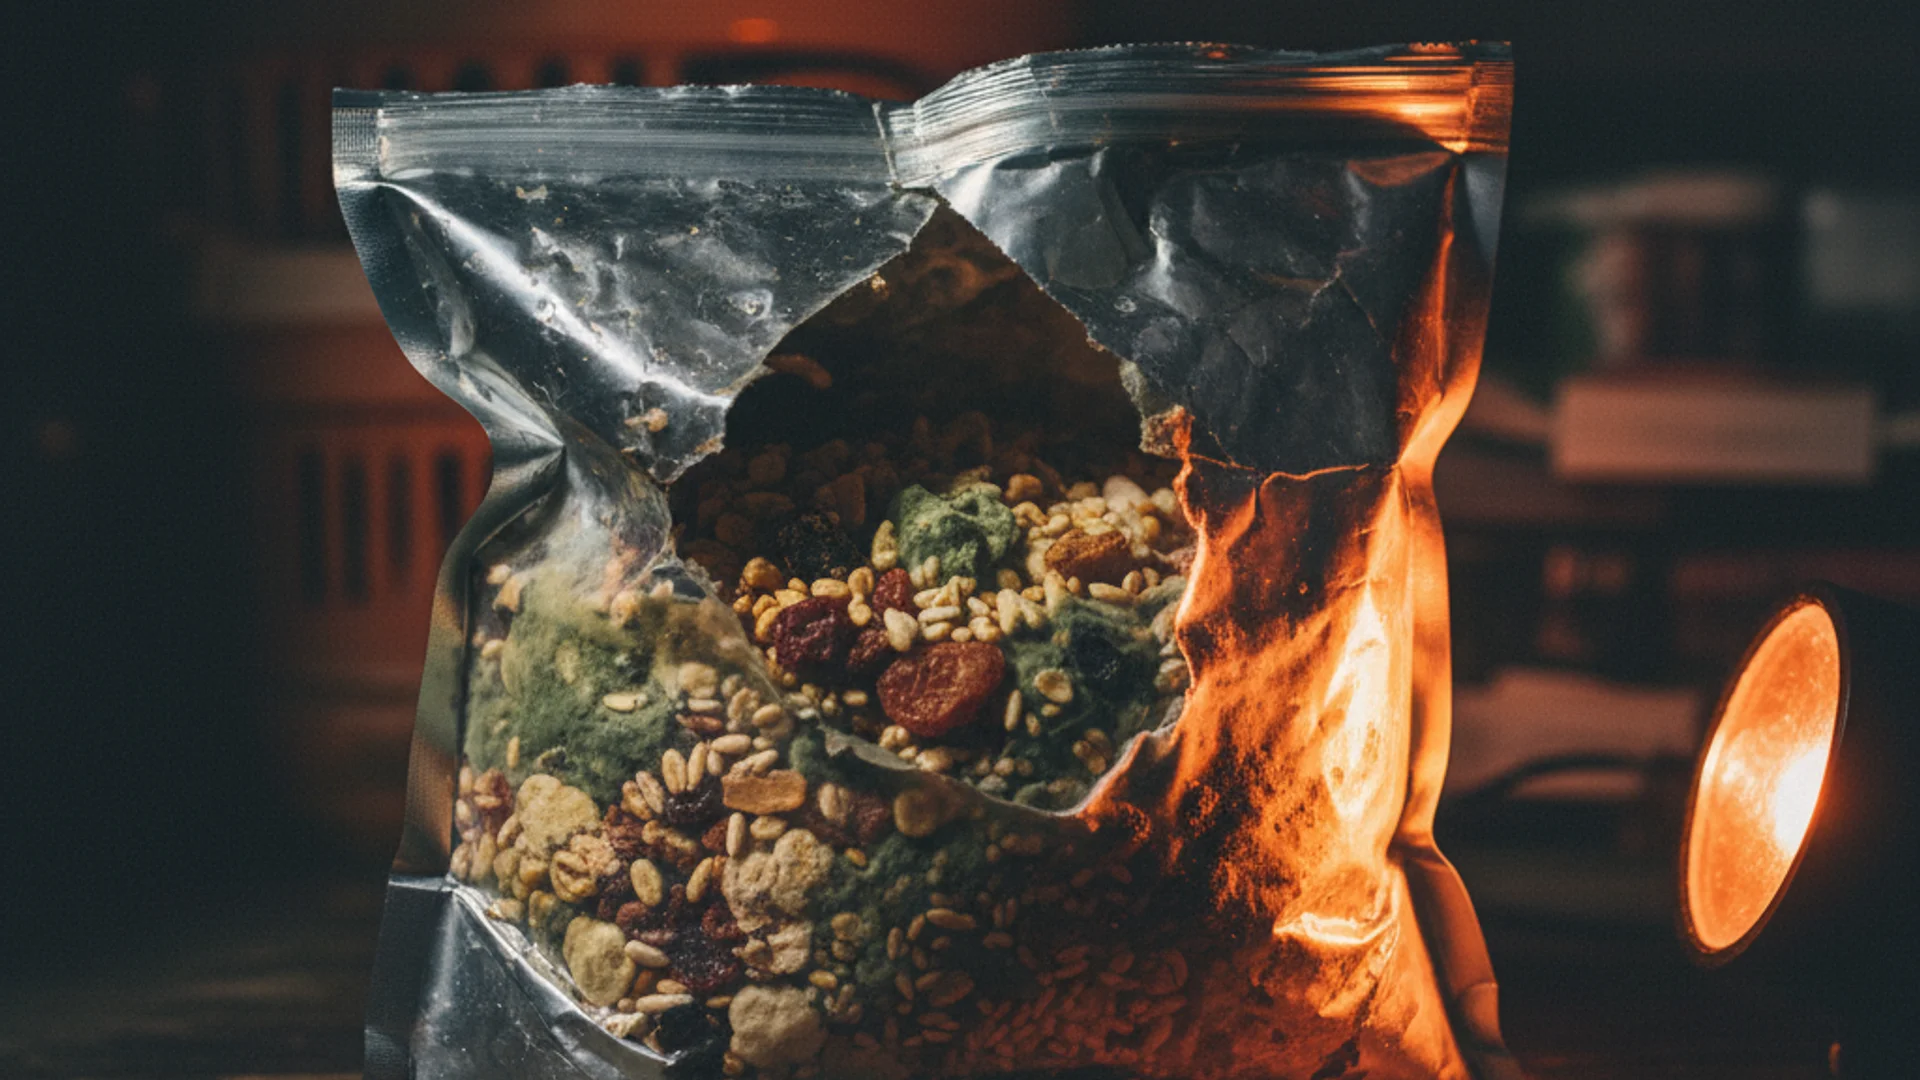
The Moisture Trap That Creates Poison
You know your food needs to be "dry." Everyone says so. But what does dry actually mean? Because if you get this wrong, you're not just creating spoiled food. You're creating botulism. Good candidates for long-term storage should have a moisture content of 10 percent or less. Anything over 12 percent encourages mold growth and chemical degradation. But here's the nightmare scenario: botulism poisoning may occur when moist products are stored in reduced oxygen packaging. Read that again. When you seal moist food with an oxygen absorber, you're creating a perfect anaerobic environment for Clostridium botulinum, the bacteria that produces one of the deadliest toxins known to humans. It doesn't need oxygen. It thrives in the exact conditions you just created trying to preserve your food. How do you know if your food is actually dry enough? A woman named Geri Guidetti, who's been teaching food storage for decades, developed a home test: longer seeds like wheat should snap cleanly in half when bent. Wheat and corn should shatter and powder when you hit them with a hammer. You're not doing this because it's fun. You're doing it because your family's survival might depend on getting this right. But there's a lower limit too. If moisture drops too far below 10%, the oxygen absorbers stop working properly. Why? Because the iron oxidation reaction that removes oxygen requires water molecules. Bone-dry food in a bone-dry environment means your absorbers just sit there, inert, while oxygen slowly degrades everything. And then there's environmental humidity. If dried foods pick up moisture from the storage area, molds and bacteria can grow, which can lead to spoilage and illness. Once relative humidity climbs past 60%, you're gambling with condensation, rust on metal containers, and moisture infiltration into supposedly sealed bags.
The sweet spot is between 35% and 50% humidity. Below 30%, packaging materials can dry out and crack. Above 50%, you're feeding mold. Most people store their mylar bags in garages or sheds because that's where they have space. Those same garages swing from 85°F during summer days to 50°F at night. Warm air holds more moisture than cold air. As temperature drops, that moisture condenses—directly onto and sometimes into your food. The mylar bag that's supposed to protect against external moisture becomes a greenhouse, breeding exactly the contamination you were trying to prevent. Basements are usually better, but not always. If your basement floods even slightly, or if you live in a humid climate, you need a dehumidifier running constantly or your food storage is a ticking time bomb. Temperature stability, moisture control, and pest prevention are the "big three" that determine whether your supplies last 5 years or 25. Get any one of them wrong and the other two don't matter.
The Sealing Failures Destroying Everything
Even if you nail the oxygen absorbers and moisture content, improper sealing makes everything pointless. And most home sealing jobs are failing in ways you can't see until years later. For the average 1-gallon bag, you need a 2-inch seal minimum. Not 1 inch. Not "whatever my impulse sealer creates." Two full inches. Here's why: all those little seams you see when you iron a mylar bag are potential channels that will let air in. You need a wide enough seal to make sure those microscopic pathways don't connect from the top edge to the bottom edge. Most household impulse sealers create seals barely an inch wide. They look sealed. They feel sealed. But the mylar bags you're using aren't single-layer plastic—they're laminated layers of polyester, aluminum, and polyethylene. Each layer can have microscopic imperfections. A narrow seal means those imperfections can align and create an oxygen highway straight into your food. Temperature matters more than anyone admits. The ideal sealing temperature is 320°F to 338°F for thin 3.5mil mylar bags, and 374°F to 429°F for thick 7mil bags. A clothing iron on the "cotton" setting hits around 400°F, which works great for thin bags but might under-heat the thicker bags that preppers buy specifically for "extra protection." You think you're being careful using heavy-duty bags, but you're actually creating weak seals because your iron isn't hot enough to properly fuse all the layers. And here's something that should make you furious: you should check your new mylar bags for leaks. Some may have small holes at a folded crease. That's right. The bags can arrive damaged from the factory. Most people never check, assuming factory-sealed packaging means quality control. It doesn't. You're sealing food into pre-compromised bags and wondering years later why everything spoiled.
The testing protocol almost nobody follows: make your seal, let it cool for 10 seconds, then make a second pass. That single step drops failure rates from 8% to 1%. Eight percent might not sound like much until you realize you've sealed 50 bags. That's four bags slowly leaking oxygen, four bags that will fail, four bags of wasted food and money that you won't discover until you need them most. In the vast majority of cases, if your "oxygen absorber didn't work," it's because the seal on your mylar bag is compromised. Not the absorber. The seal. But people throw away perfectly good absorbers and buy new ones, never realizing the problem is their sealing technique.
The Foods You Should Never Seal and the Myth of the Vacuum Look
Some foods will go rancid in mylar bags no matter what you do. And nobody wants to tell you this because they're selling you the bags and the freeze-dried meals and the fantasy that you can store anything forever. Foods that are high in fats or oils—brown rice, whole wheat flour, nuts, shortening—will go rancid in a much shorter period of time. Brown rice, the "healthy choice," has a shelf life of 1 to 2 years maximum because of the oils in the bran layer. Those oils oxidize even in low-oxygen environments. You're not creating long-term food storage. You're creating expensive bags of rancid sludge. White rice, pinto beans, corn, wheat, rolled oats, pasta, potato flakes, dehydrated apple slices, and sugar are examples of low-moisture foods that can be stored for 30-plus years if stored appropriately. Notice what's missing from that list: anything with meaningful fat content, anything particularly tasty, anything nutritionally complete on its own. The most experienced preppers accept this reality: long-term storage is about calories and carbohydrates, not gourmet nutrition. You supplement with shorter-term storage that you rotate (canned goods, oils, proteins), and you accept that your 20-year buckets are boring staples, not complete meals. Now let's talk about the visual test everyone gets wrong. You sealed your bag 48 hours ago. You check it. It doesn't look vacuum-sealed and tight. Did the oxygen absorbers fail? Probably not. It's a very common misconception that the "vacuum-packed look" is confirmation that the oxygen has been removed. Oxygen absorbers do not absorb air—they absorb oxygen, which is only 21% of air. That means roughly one-fifth of the air volume will be gone, but four-fifths remains no matter how many oxygen absorbers you use. Nitrogen makes up 78% of air, and oxygen absorbers don't touch it.
Your bag can look puffy and still be perfectly oxygen-free. Especially with low-density foods like pasta or popcorn. The bag might never get that tight, shrink-wrapped appearance, and that's fine. But here's where it gets tricky: powders such as flour or freeze-dried eggs won't show contraction either. You need to check the "bubble" at the top of the bag near the seal. Both sides of the bag should be pulled together if your food is sealed properly. That's your visual indicator, not whether the whole bag looks vacuum-sealed. This visual confusion causes two catastrophic errors: people throw away perfectly good storage because "it doesn't look right," or they trust failed seals because "it looks vacuum sealed" when actually the bag just settled and compressed naturally. Neither the puffy look nor the tight look tells you definitively whether oxygen is gone. The only real test is checking that seal area for contraction within 24 hours.
What You Need to Do in the Next 48 Hours
Alright. You've read this far, which means some part of you suspects your food storage might be compromised. Here's what you do right now, not next week, not when you "get around to it." First 24 hours: Check your existing storage. Pull out a few random bags. Look at the seal area near the top. Are both sides of the mylar pulled tight against each other? If the seal area is loose or puffy, that bag failed. Pull it, use the food now, and reseal it properly. If there's no vacuum draw after 24 hours from original sealing, the absorber likely spent itself fighting a leak—you need to replace it and reseal. Grab one of your sealed buckets and check for any swelling or odd smells when you crack the lid. You're not opening the mylar bags yet, just doing a spot check. If anything smells off or musty, you've got moisture infiltration or spoilage. That entire bucket needs to be inspected. Next: verify your storage environment. Get a cheap humidity and temperature monitor. Put it where you're storing food. Check it daily for a week. If humidity is consistently above 55%, you need a dehumidifier or you need to move your storage. If temperature is swinging more than 10 degrees in a 24-hour period, your location is wrong. Basements with concrete floors and consistent temps between 50°F and 65°F are ideal. Garages and attics are food-spoilage incubators. Second 24 hours: Fix your sealing process. Order a proper impulse sealer if you don't have one (you need something that can create a 2-inch seal reliably). Get a temperature gun if you're using an iron, and verify you're hitting at least 380°F for thick bags. Practice the double-seal technique: seal, wait 10 seconds, seal again. That second pass is the difference between 8% failure and 1% failure. Recalculate your oxygen absorber needs. For 1-gallon bags of rice or wheat, one 500cc absorber or two 300cc absorbers.
For pasta or other low-density foods in 1-gallon bags, bump it to two 500cc absorbers. For 5-gallon buckets, use one 2000cc and one 500cc absorber as a baseline, more for low-density foods. Write this down and tape it to your sealing station so you don't forget mid-project. Here's the longer-term move: start rotating and testing. Pick one bucket every six months and open it. You're not just checking for spoilage; you're verifying your process actually works. Cook a meal with it. If the rice tastes off, if the beans won't soften, if anything seems wrong, your storage process failed and you need to fix it before you seal another hundred bags. And accept this reality: up to 30 percent of stored grains spoil within a year when oxygen is left unchecked. Even when stored in mylar bags with the right oxygen absorbers, you're looking at 25 to 30 years maximum under ideal conditions. Shelf lives are not guaranteed—they're affected by ingredients, storage location, and packing technique. Every shortcut you take, every step you skip, every "good enough" decision cuts years off that timeline. The difference between real food security and a garage full of expensive trash is precision. Not perfection, but precision. Measure twice, seal once, check your work, and accept that this is a skill that requires practice and iteration. The good news? Once you get it right, you've got decades of actual security. The bad news? Most people never get it right, and they don't find out until it's too late to matter.
Frequently Asked Questions
How do I know if my oxygen absorbers are still good?
Unopened oxygen absorbers in their original vacuum-sealed package should feel soft and slightly pliable, like a beanbag. Once you open the package, they'll start to activate immediately and get warm to the touch—that's normal. If they feel rock-hard before opening, they've already activated and are useless. After opening, you have about 15 minutes to use them before they lose effectiveness. Store unused absorbers in a mason jar filled with rice and seal it tight; this keeps them active for months instead of hours.
My mylar bags don't look vacuum-sealed. Did I do something wrong?
Probably not. Oxygen absorbers remove oxygen (21% of air), not nitrogen (78% of air). That means the bag will only contract by about one-fifth of its volume, and it might not contract at all if you're storing low-density food like pasta or popcorn. The real test is the seal area at the top of the bag—both sides of the mylar should be pulled tight against each other near the seal within 24 hours. If that area is tight, your bag is likely fine even if the rest looks puffy.
Can I store brown rice for long-term emergency food?
No. Brown rice contains oils in the bran layer that go rancid even in sealed, low-oxygen environments. You'll get maybe 1 to 2 years maximum before it tastes like cardboard soaked in old fryer oil. Store white rice instead—it'll last 30 years under proper conditions. If you want the nutrition of brown rice, store white rice long-term and keep a rotating supply of brown rice that you actually use and replace every 6 to 12 months.
What's the best place to store mylar bags of food?
A basement with stable temperatures between 50°F and 70°F and humidity between 35% and 50%. Avoid garages (wild temperature swings create condensation cycles), attics (too hot in summer), and anywhere that floods or gets damp. Temperature stability matters more than cold—a steady 65°F beats a location that swings between 50°F and 80°F. If you don't have a good location, invest in a dehumidifier and temperature monitor before you invest in more food.
How much of a seal do I actually need on a mylar bag?
Minimum 2 inches for a 1-gallon bag. Mylar is made of laminated layers, and narrow seals let microscopic channels form between those layers that slowly leak oxygen back in. Use an impulse sealer or iron to create your seal, let it cool for 10 seconds, then make a second pass over the same area. That double-seal technique drops failure rates from 8% to 1%. If your sealer only makes 1-inch seals, make two parallel seals right next to each other.
How do I test if my food is dry enough to store long-term?
For grains like wheat or corn: hit a few kernels with a hammer. They should shatter into powder, not dent or squish. For seeds and beans: bend them sharply. They should snap cleanly in half. If they bend without breaking, they're too moist. You need moisture content at or below 10%—any higher and you risk mold and botulism in sealed bags. If you're serious about this, buy a moisture meter. They're $20 and they remove the guesswork.
Do I really need to put mylar bags inside buckets?
Yes. Mylar protects against oxygen and light. Buckets protect against rodents, physical damage, and crushing. Rodents will chew straight through mylar—I've seen it happen to bags that looked perfectly stored. Use food-grade buckets with gamma seal lids for easy access, and always assume that anything not inside a hard container is eventually going to get chewed, stepped on, or punctured. The bucket is insurance, and it's cheap insurance compared to replacing 20 pounds of ruined food.
Conclusion
If you've made it this far, you're either pissed off or grateful you found out now instead of five years from now when you crack open a bucket and find garbage. Both reactions are valid. The prepper industry wants your money more than it wants you to succeed, and the YouTube tutorials are made by people who sealed their first bag six months ago and have no idea whether it'll still be good in 2035. Here's what you do next: check your existing storage today, fix your process this week, and test one bucket every six months. This isn't a "set it and forget it" situation. This is a skill that requires iteration, verification, and a willingness to admit when you got it wrong. The good news is that once you get it right, you've built something real—actual food security that'll outlast most of the shit that's coming. And if you want a system that'll help you navigate this kind of practical, no-bullshit information when the internet goes dark, that's exactly why we built SurvivalBrain. Offline AI, no surveillance, no subscriptions, just knowledge you can access during the emergencies that matter. We launch Q1 2026 at $149 for early access (normally $199). Get on the waitlist at https://survivalbrain.ai/#waitlist and make sure you're not flying blind when it counts.
Get Early Access to Uncensored Offline AI
Join the waitlist for SurvivalBrain launching Q1 2026. Early supporters lock in $149 lifetime pricing (save $50).
Lock In $149 Pricing